
I can still remember the first time I tried my mom’s homemade Red Velvet Cheesecake Brownies. It was during our annual family holiday gathering, and the aroma of the rich chocolate and tangy cream cheese filling had us all gathering around the table in anticipation. As I took that first bite, the flavors danced on my tongue – the velvety chocolate, the creamy cheesecake, and the perfect balance of sweetness. From that moment on, I knew this recipe would become a cherished tradition in our household.
Why This Red Velvet Cheesecake Brownies Recipe Will Become Your Go-To
The Secret Behind Perfect Red Velvet Cheesecake Brownies
What sets this Red Velvet Cheesecake Brownies recipe apart is the meticulous attention to detail and the perfect balance of flavors. The key lies in the careful selection and preparation of the ingredients. From the deep, chocolatey notes of the unsweetened cocoa powder to the tangy richness of the cream cheese filling, every element works in harmony to create a truly decadent treat.
Essential Ingredients You’ll Need
- 1 cup all-purpose flour: This provides the structure and a tender crumb for the brownies.
- 1/2 cup unsweetened cocoa powder: The high-quality cocoa powder is the foundation of the rich, chocolatey flavor.
- 1 teaspoon baking powder: This helps the brownies rise and achieve a fudgy texture.
- 1/4 teaspoon salt: A pinch of salt enhances the other flavors and prevents the dish from being overly sweet.
- 1/2 cup unsalted butter, melted: The melted butter adds moisture and a velvety mouthfeel to the brownies.
- 1 cup granulated sugar: This sweetens the base and complements the tangy cream cheese filling.
- 2 large eggs: The eggs provide structure and bind the ingredients together.
- 1 teaspoon vanilla extract: The vanilla enhances the overall flavor profile.
- 8 ounces cream cheese, softened: The cream cheese filling is the star of the show, adding a luxurious creaminess.
- 1/4 cup granulated sugar: This sweetens the cream cheese layer.
- 1 egg: The additional egg helps the cheesecake layer set properly.
- 1 teaspoon vanilla extract: More vanilla enhances the flavor of the filling.
Step-by-Step Red Velvet Cheesecake Brownies Instructions
Preparing Your Red Velvet Cheesecake Brownies
Prep time for these Red Velvet Cheesecake Brownies is just 10 minutes, and the total cooking time is 30 minutes, for a total time of 40 minutes. You’ll need a 9-inch square baking pan, a mixing bowl, and a hand mixer or stand mixer to make these decadent treats.
1- Preheat your oven to 350°F and grease the baking pan with non-stick cooking spray or line it with parchment paper for easy removal.
2- In a medium bowl, whisk together the all-purpose flour, unsweetened cocoa powder, baking powder, and salt until well combined. Set this dry ingredient mixture aside.
3- In a separate large bowl, whisk together the melted unsalted butter and 1 cup of granulated sugar until the sugar has dissolved and the mixture is smooth.
4- Add the 2 large eggs, one at a time, beating well after each addition. Then stir in the 1 teaspoon of vanilla extract.
5- Gradually fold the dry ingredient mixture into the wet ingredients, mixing just until combined. Be careful not to overmix.
6- Pour the brownie batter into the prepared baking pan and spread it out evenly. In a separate bowl, beat the softened cream cheese with the 1/4 cup of granulated sugar, 1 egg, and 1 teaspoon of vanilla extract until smooth and creamy. Dollop the cheesecake mixture over the brownie batter and use a knife to swirl it in, creating a marbled effect.
Pro Tips for Success
- Be sure to use room-temperature ingredients for the best results. Allowing the cream cheese and eggs to come to room temperature will ensure a smooth, creamy filling.
- Don’t overmix the batter once the dry and wet ingredients are combined. Overmixing can result in a dense, tough texture.
- Use a sharp knife or offset spatula to create the perfect swirl pattern in the cheesecake layer. Gently drag the knife through the batter to achieve the desired look.
- Keep a close eye on the brownies during the baking process. The centers should be set, but the edges shouldn’t be overbaked. Insert a toothpick to check for doneness.
Serving and Storing Your Red Velvet Cheesecake Brownies
Perfect Pairings for Red Velvet Cheesecake Brownies
These Red Velvet Cheesecake Brownies are the perfect indulgent treat to enjoy on their own, but they also pair beautifully with a scoop of vanilla ice cream or a dollop of freshly whipped cream. For a more decadent pairing, serve them alongside a rich cup of hot chocolate or a glass of cold milk. This recipe yields 9 generously-sized brownies, making it an ideal dessert for small gatherings or a cozy night in.
Storage and Make-Ahead Tips
To store your Red Velvet Cheesecake Brownies, let them cool completely, then cut into squares and place them in an airtight container. They’ll keep in the refrigerator for up to 5 days. For longer storage, you can freeze the brownies for up to 3 months. To reheat, simply thaw them in the refrigerator overnight and then bring them to room temperature before serving.
These brownies also make a great make-ahead dessert. Prepare the batter and cheesecake swirl, then bake the brownies a day or two in advance. Store them in the refrigerator until ready to serve, and they’ll be just as moist and delicious.
Variations and Dietary Adaptations for Red Velvet Cheesecake Brownies
Creative Red Velvet Cheesecake Brownies Variations
If you’re feeling adventurous, try adding a sprinkle of chopped pecans or walnuts to the top of the brownies for a delightful crunch. You could also swirl in a layer of raspberry or cherry preserves for a pop of fruity flavor. For a seasonal twist, top the brownies with a dusting of crushed peppermint candies or a drizzle of white chocolate during the holiday season.
Making Red Velvet Cheesecake Brownies Diet-Friendly
To make these brownies gluten-free, simply substitute the all-purpose flour with a 1:1 gluten-free flour blend. For a vegan version, replace the butter with melted coconut oil or vegan butter, and the cream cheese with a dairy-free cream cheese alternative. To reduce the carb count, you can use a granulated sugar substitute in both the brownie batter and the cheesecake filling.
Frequently Asked Questions
Q: Can I use a different type of chocolate instead of unsweetened cocoa powder?
A: While you can experiment with different chocolate varieties, the unsweetened cocoa powder is essential for achieving the classic red velvet flavor and color. Replacing it may result in a different taste and texture.
Q: How can I ensure the brownies don’t overbake?
A: Keep a close eye on the brownies during the 30-minute baking time. The centers should be set, but the edges shouldn’t be too dry or crumbly. Insert a toothpick to check for doneness – it should come out with a few moist crumbs attached.
Q: Can I make the Red Velvet Cheesecake Brownies ahead of time?
A: Absolutely! These brownies can be made a day or two in advance. Simply bake them, let them cool completely, and store them in an airtight container in the refrigerator until ready to serve.
Q: How many brownies does this recipe yield?
A: This recipe for Red Velvet Cheesecake Brownies makes 9 generous servings. The rich and indulgent nature of these treats means a little goes a long way, making them perfect for sharing.
Q: What can I do if the cheesecake layer cracks while baking?
A: If the cheesecake layer cracks, don’t worry! The brownies will still taste delicious. To help prevent cracking, make sure not to overmix the cheesecake batter and be careful not to overbake the brownies.

Red Velvet Cheesecake Brownies
- Total Time: 40
- Yield: 9 brownies
Description
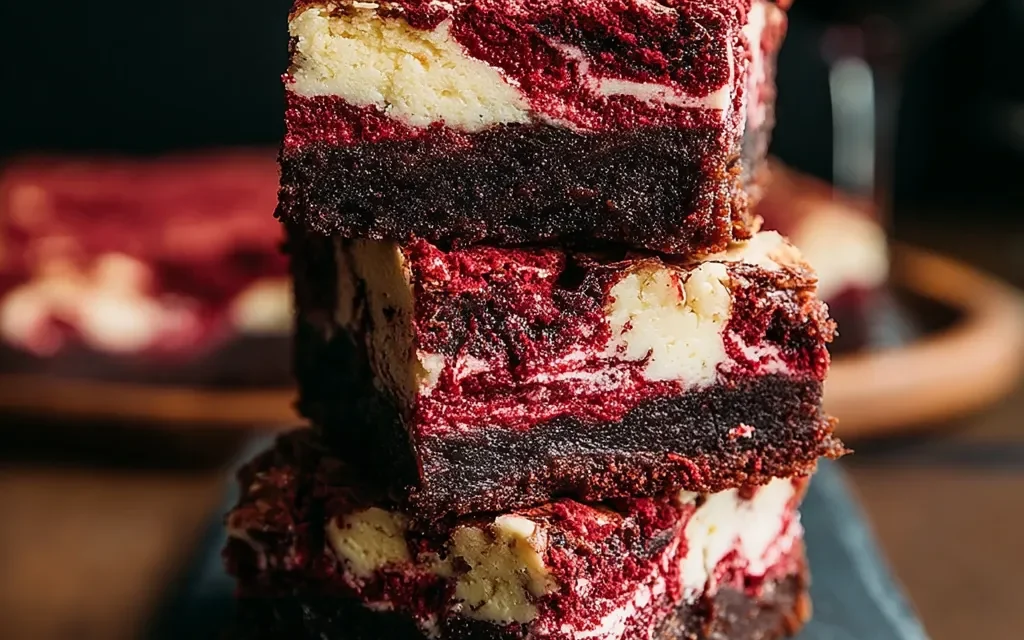
Indulge in the ultimate fusion of rich red velvet and creamy cheesecake with these decadent Red Velvet Cheesecake Brownies. A perfect balance of fudgy chocolate and tangy cream cheese, this quick and easy recipe is sure to satisfy any sweet tooth.
Ingredients
– 1 cup all-purpose flour
– 1/2 cup unsweetened cocoa powder
– 1 teaspoon baking powder
– 1/4 teaspoon salt
– 1/2 cup unsalted butter, melted
– 1 cup granulated sugar
– 2 large eggs
– 1 teaspoon vanilla extract
– 8 ounces cream cheese, softened
– 1/4 cup granulated sugar
– 1 egg
– 1 teaspoon vanilla extract
Instructions
1. Preheat oven to 350°F. Grease an 8×8-inch baking pan.
2. In a medium bowl, whisk together the flour, cocoa powder, baking powder, and salt.
3. In a separate large bowl, combine the melted butter and 1 cup of sugar. Beat in the 2 eggs and 1 teaspoon of vanilla until well combined.
4. Gradually stir the dry ingredients into the wet ingredients until just combined, being careful not to overmix.
5. In a small bowl, beat the cream cheese with the 1/4 cup of sugar, 1 egg, and 1 teaspoon of vanilla until smooth and creamy.
6. Spread half of the red velvet brownie batter into the prepared pan. Carefully spoon the cheesecake mixture over the top and spread it evenly. Top with the remaining red velvet brownie batter, and use a knife to swirl the two layers together.
7. Bake for 30-35 minutes, or until a toothpick inserted in the center comes out clean. Allow the brownies to cool completely before cutting and serving.
Notes
For an extra decadent touch, top the cooled brownies with a cream cheese frosting. Store leftover brownies in an airtight container in the refrigerator for up to 5 days.
- Prep Time: 10
- Cook Time: 30
- Category: Dessert
- Method: Baking
- Cuisine: American
Conclusion
Red Velvet Cheesecake Brownies are a decadent treat that will have your family and friends begging for the recipe. With their perfectly balanced flavors and irresistible texture, it’s no wonder this recipe has become a cherished tradition in my household. I encourage you to give it a try and experience the magic for yourself. Let me know how they turn out and be sure to share your own tips and variations in the comments below!


