
Reese’s Peanut Butter Earthquake Cake has been a beloved dessert in my family for as long as I can remember. Growing up, my grandma would make it for every special occasion – birthdays, holidays, you name it. The way the rich peanut butter and fudgy chocolate swirled together into a decadent, moist cake was always the highlight of the celebration. I’ll never forget the first time I tried it, how the crunchy peanut butter chips and gooey Reese’s Peanut Butter Cups just melted in my mouth. It was pure bliss!
Even now, the smell of Reese’s Peanut Butter Earthquake Cake baking in the oven instantly takes me back to those cherished family gatherings. There’s just something so comforting and indulgent about it. Whenever I make it for my own loved ones, I can’t help but smile as I watch their faces light up with the first delicious bite. It’s the kind of recipe that becomes a new tradition, a sweet memory that gets passed down through the generations. And I’m so excited to share my grandma’s famous Reese’s Peanut Butter Earthquake Cake with all of you today!
Why This Reese’s Peanut Butter Earthquake Cake Recipe Will Become Your Go-To
This Reese’s Peanut Butter Earthquake Cake is truly a showstopper. It’s rich, decadent, and bursting with peanut butter and chocolate flavors in every single bite. But what really sets it apart is the unique “earthquake” effect – a gooey, fudgy center that emerges as the cake bakes, almost like magic. It’s an absolute flavor explosion that will have your guests raving.
The Secret Behind Perfect Reese’s Peanut Butter Earthquake Cake
The key to this recipe is the way the peanut butter and chocolate are incorporated. Rather than just swirling them together, we create a unique layered effect that results in that signature “earthquake” center. Plus, the addition of chopped Reese’s Peanut Butter Cups throughout the batter takes the peanut butter flavor to the next level. Trust me, one taste and you’ll be hooked!
Essential Ingredients You’ll Need
- All-purpose flour: The foundation for our moist, tender cake.
- Granulated sugar: Sweetens the cake and balances the rich flavors.
- Unsweetened cocoa powder: Provides the deep, chocolatey backbone.
- Baking powder and baking soda: Gives the cake its rise and perfect texture.
- Salt: Enhances all the other flavors.
- Eggs: Helps bind the cake together.
- Vegetable oil: Keeps the crumb nice and moist.
- Milk: Adds moisture and richness.
- Creamy peanut butter: The star of the show, delivering that iconic peanut butter taste.
- Reese’s Peanut Butter Cups: Chopped up and folded into the batter.
Step-by-Step Reese’s Peanut Butter Earthquake Cake Instructions
Preparing Your Reese’s Peanut Butter Earthquake Cake
This Reese’s Peanut Butter Earthquake Cake comes together quickly, with just about 15 minutes of active prep time. Once it’s in the oven, the magic happens as the cake bakes to perfection. You’ll need a 9×13 inch baking pan and a few basic mixing bowls to get started.
1- Preheat your oven to 350°F and grease the baking pan with nonstick cooking spray.
2- In a large bowl, whisk together the flour, sugar, cocoa powder, baking powder, baking soda, and salt until well combined.
3- In a separate bowl, beat the eggs, then mix in the vegetable oil and milk until fully incorporated.
4- Gently fold the wet ingredients into the dry ingredients, being careful not to overmix. The batter should be thick and glossy.
5- Fold in the creamy peanut butter and chopped Reese’s Peanut Butter Cups, making sure they’re evenly distributed throughout the batter.
6- Pour the batter into the prepared baking pan and bake for 30-35 minutes, until a toothpick inserted in the center comes out clean.
Pro Tips for Success
To ensure your Reese’s Peanut Butter Earthquake Cake turns out perfectly every time, here are a few expert tips:
- Make sure not to overmix the batter, as this can result in a tough, dense cake. Fold the wet and dry ingredients together gently.
- Let the cake cool completely before slicing into it. This helps the “earthquake” center set up properly.
- For an extra decadent touch, top the cooled cake with a drizzle of melted peanut butter and chopped Reese’s Peanut Butter Cups.
- If you want to reduce the sweetness, try using dark chocolate Reese’s Peanut Butter Cups instead of the regular variety.
Serving and Storing Your Reese’s Peanut Butter Earthquake Cake
Perfect Pairings for Reese’s Peanut Butter Earthquake Cake
This Reese’s Peanut Butter Earthquake Cake is the ultimate indulgent dessert, perfect for any special occasion. It pairs beautifully with a scoop of vanilla ice cream or a dollop of freshly whipped cream. And don’t forget a hot cup of coffee or a cold glass of milk – the perfect accompaniment to this rich, chocolatey treat.
Storage and Make-Ahead Tips
Reese’s Peanut Butter Earthquake Cake will keep, covered, at room temperature for up to 4 days. For longer storage, you can refrigerate it for up to 1 week. The cake also freezes well – just wrap it tightly in plastic wrap and aluminum foil, and it will keep for up to 3 months. When ready to serve, simply thaw it at room temperature.
Variations and Dietary Adaptations for Reese’s Peanut Butter Earthquake Cake
Creative Reese’s Peanut Butter Earthquake Cake Variations
While the classic version is hard to beat, there are plenty of ways to put your own spin on Reese’s Peanut Butter Earthquake Cake. Try swapping out the Reese’s Peanut Butter Cups for other candy bars, like Snickers or Twix. You could also use crunchy peanut butter instead of creamy for an extra textural element. And for a festive touch, top the cake with holiday-themed sprinkles or crushed peppermint.
Making Reese’s Peanut Butter Earthquake Cake Diet-Friendly
To make this recipe more diet-friendly, you can substitute the all-purpose flour for a gluten-free flour blend, and use sugar-free peanut butter and Reese’s Peanut Butter Cups. For a vegan version, replace the eggs with flax or chia eggs, the milk with plant-based milk, and the Reese’s with vegan peanut butter cups. Just be mindful that the texture and flavor may be slightly different from the original.
Frequently Asked Questions
Q: Can I use crunchy peanut butter instead of creamy?
A: Absolutely! Crunchy peanut butter will add a lovely texture to the Reese’s Peanut Butter Earthquake Cake. Just be sure to use the same amount as the recipe calls for.
Q: How long does the cake need to cool before slicing?
A: For best results, let the Reese’s Peanut Butter Earthquake Cake cool completely, about 1-2 hours, before slicing into it. This allows the “earthquake” center to set up properly.
Q: Can I make this cake ahead of time?
A: Yes, Reese’s Peanut Butter Earthquake Cake can be made up to 1 week in advance. Simply store it in the refrigerator, covered, until ready to serve.
Q: What’s the best way to reheat leftover slices?
A: For best texture, you can reheat individual slices in the microwave for 15-20 seconds. You can also warm the entire cake in a 300°F oven for 5-10 minutes.
Q: Help! My cake didn’t develop the “earthquake” center. What went wrong?
A: If your Reese’s Peanut Butter Earthquake Cake didn’t have the signature gooey center, it could be due to overmixing the batter or overbaking the cake. Make sure to gently fold the ingredients together and keep a close eye on the baking time.

Reese’s Peanut Butter Earthquake Cake
- Total Time: 35
- Yield: 12
Description
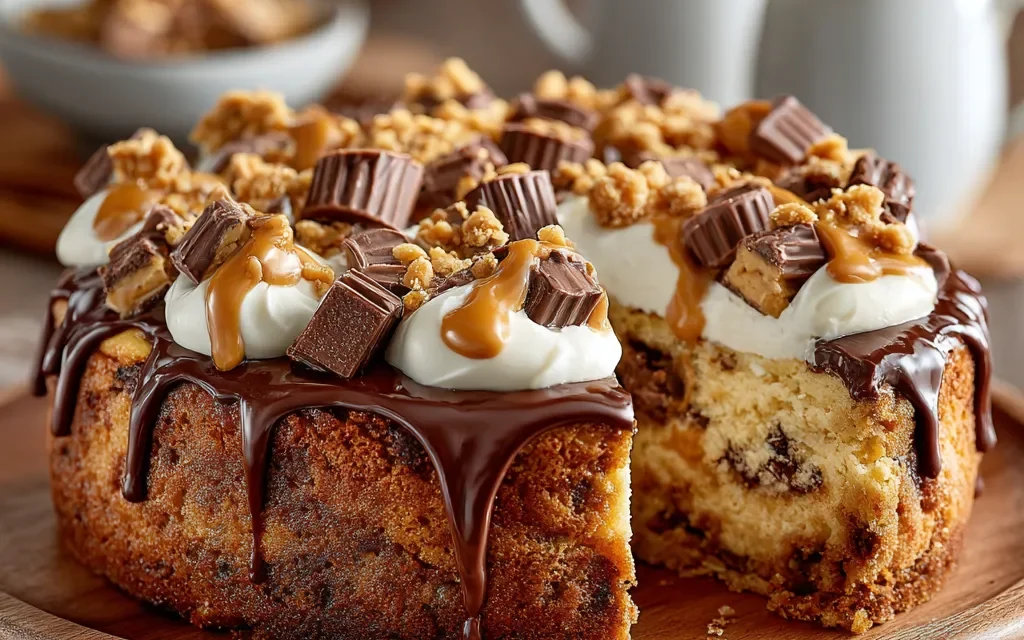
Indulge in the ultimate peanut butter and chocolate experience with this Reese’s Peanut Butter Earthquake Cake. A moist and fudgy chocolate cake is swirled with creamy peanut butter and topped with crumbled Reese’s Peanut Butter Cups for a truly unforgettable dessert.
Ingredients
– 1 box chocolate cake mix
– 1 cup creamy peanut butter
– 1/3 cup vegetable oil
– 3 large eggs
– 1 cup Reese’s Peanut Butter Cups, chopped
Instructions
1. – Preheat oven to 350°F. Grease a 9×13-inch baking pan.
2. – In a large bowl, prepare the chocolate cake mix according to package instructions, adding the vegetable oil and eggs.
3. – Dollop the peanut butter over the batter and use a knife or fork to swirl it through the cake, creating a marbled effect.
4. – Sprinkle the chopped Reese’s Peanut Butter Cups over the top of the batter.
5. – Bake for 25-30 minutes, or until a toothpick inserted in the center comes out clean.
6. – Allow the cake to cool completely before serving.
Notes
For an extra indulgent touch, drizzle the cooled cake with melted chocolate or serve with a scoop of vanilla ice cream.
- Prep Time: 10
- Cook Time: 25
- Category: Dessert
- Method: Baking
- Cuisine: American
Conclusion
I truly hope this Reese’s Peanut Butter Earthquake Cake becomes a new family favorite in your home, just like it is in mine. The rich peanut butter and fudgy chocolate flavors are simply irresistible, and that magical “earthquake” center takes it to the next level. Whether you’re making it for a special occasion or just because, I guarantee it will be the star of the show. So what are you waiting for? Preheat your oven and get ready to experience the ultimate Reese’s Peanut Butter indulgence!


