
I can still remember the first time my grandmother taught me how to make her famous Mushroom and Cheese Pinwheels. I was just a little girl, barely reaching the counter, but I was determined to learn her secret recipe. As we rolled out the dough and sprinkled the savory mushroom and cheese filling, the aroma filled the kitchen, instantly transporting me back to those cozy Sunday afternoons spent baking together. It’s a memory I cherish to this day, and it’s why this recipe will always hold a special place in my heart.
Why This Mushroom and Cheese Pinwheels Recipe Will Become Your Go-To
The Secret Behind Perfect Mushroom and Cheese Pinwheels
This Mushroom and Cheese Pinwheels recipe is truly special because it combines the perfect balance of flaky, buttery dough with a rich, flavorful filling that’s guaranteed to delight your taste buds. What sets this recipe apart is the careful attention to detail – from the way the dough is rolled and cut, to the precise blend of mushrooms and cheeses used. The result is a delectable pinwheel that’s sure to become a new family favorite. This recipe yields 12 servings, with each serving being a single pinwheel.
Essential Ingredients You’ll Need
To make these irresistible Mushroom and Cheese Pinwheels, you’ll need a few key ingredients: all-purpose flour, unsalted butter, cream cheese, mushrooms, garlic, Parmesan cheese, and a touch of seasoning. Each of these components plays a vital role in creating the perfect balance of flavors and textures that make this recipe so special.
Step-by-Step Mushroom and Cheese Pinwheels Instructions
Preparing Your Mushroom and Cheese Pinwheels
This recipe takes 28 minutes total – 10 minutes for prep and 18 minutes for cooking. You’ll need a rolling pin, a sharp knife, and a baking sheet to get started. Let’s dive in and create these delectable Mushroom and Cheese Pinwheels!
1- Begin by preheating your oven to 375°F. In a large mixing bowl, combine 2 cups of all-purpose flour and 1/2 teaspoon of salt. Cut in 1/2 cup of unsalted butter until the mixture resembles coarse crumbs.
2- Gradually stir in 1/4 cup of cold water, mixing just until the dough comes together. Knead the dough lightly on a lightly floured surface, then roll it out into a 12×9-inch rectangle.
3- In a separate bowl, sauté 8 ounces of sliced mushrooms and 2 cloves of minced garlic in 1 tablespoon of olive oil over medium heat for 5-7 minutes, or until the mushrooms are tender.
4- Spread 4 ounces of softened cream cheese evenly over the dough, leaving a 1-inch border. Top with the sautéed mushroom mixture and 1/2 cup of grated Parmesan cheese.
5- Carefully roll up the dough, starting from the long side, into a tight spiral. Slice the roll into 12 equal pieces and place them, cut-side up, on a baking sheet.
6- Bake the Mushroom and Cheese Pinwheels for 18-20 minutes, or until the dough is golden brown and the cheese is melted and bubbly. Serve hot and enjoy!
Pro Tips for Success
To ensure your Mushroom and Cheese Pinwheels turn out perfectly, here are a few pro tips:
- Use a sharp knife to slice the rolled dough to get clean, even cuts.
- Brush the tops of the pinwheels with a little melted butter or egg wash for a beautiful golden-brown finish.
- Experiment with different mushroom varieties, such as shiitake or portobello, to add depth of flavor.
- Chilling the dough for 30 minutes before rolling and cutting can help it hold its shape better.
Serving and Storing Your Mushroom and Cheese Pinwheels
Perfect Pairings for Mushroom and Cheese Pinwheels
These Mushroom and Cheese Pinwheels are the perfect appetizer or snack to serve at any gathering. They pair beautifully with a crisp salad, a light tomato soup, or a glass of your favorite white wine. And since this recipe yields 12 servings, with each serving being a single pinwheel, it’s easy to feed a crowd.
Storage and Make-Ahead Tips
To store your Mushroom and Cheese Pinwheels, simply place them in an airtight container and refrigerate for up to 3 days. When you’re ready to enjoy them again, simply reheat them in a 350°F oven for 5-7 minutes, or until heated through. You can also freeze the unbaked pinwheels for up to 2 months. Just thaw them in the refrigerator overnight before baking.
Variations and Dietary Adaptations for Mushroom and Cheese Pinwheels
Creative Mushroom and Cheese Pinwheels Variations
While this classic Mushroom and Cheese Pinwheels recipe is hard to beat, there are plenty of ways to put your own spin on it. Try swapping the mushrooms for sautéed spinach and feta, or experiment with different cheese combinations, like cheddar and bacon or sun-dried tomato and mozzarella. You can also make mini pinwheels for a bite-sized appetizer.
Making Mushroom and Cheese Pinwheels Diet-Friendly
To make this recipe more diet-friendly, you can use reduced-fat cream cheese and swap the all-purpose flour for a gluten-free or low-carb alternative. For a vegan version, replace the cheese with a plant-based alternative and use olive oil instead of butter.
Frequently Asked Questions
Q: Can I use a different type of mushroom in this recipe?
A: Absolutely! Feel free to experiment with different mushroom varieties, such as shiitake, portobello, or even a mix of wild mushrooms. Just be sure to adjust the sauté time as needed to ensure the mushrooms are tender and flavorful.
Q: How many servings does this recipe make?
A: This recipe makes exactly 12 servings, with each serving being 1 pinwheel.
Q: Can I make the Mushroom and Cheese Pinwheels ahead of time?
A: Yes, you can make these pinwheels ahead of time. Simply prepare the recipe up to the point of baking, then cover and refrigerate the unbaked pinwheels for up to 2 days. When ready to serve, bake them as directed in the recipe.
Q: My pinwheels seem to be falling apart. What can I do?
A: If your pinwheels are having trouble holding their shape, try chilling the dough for 30 minutes before rolling and cutting. This will help the dough hold its structure better. Additionally, make sure to roll the dough tightly and use a sharp knife to slice the rolls into even pieces.

Mushroom and Cheese Pinwheels
- Total Time: 28
- Yield: 12 servings
- Diet: Vegetarian
Description
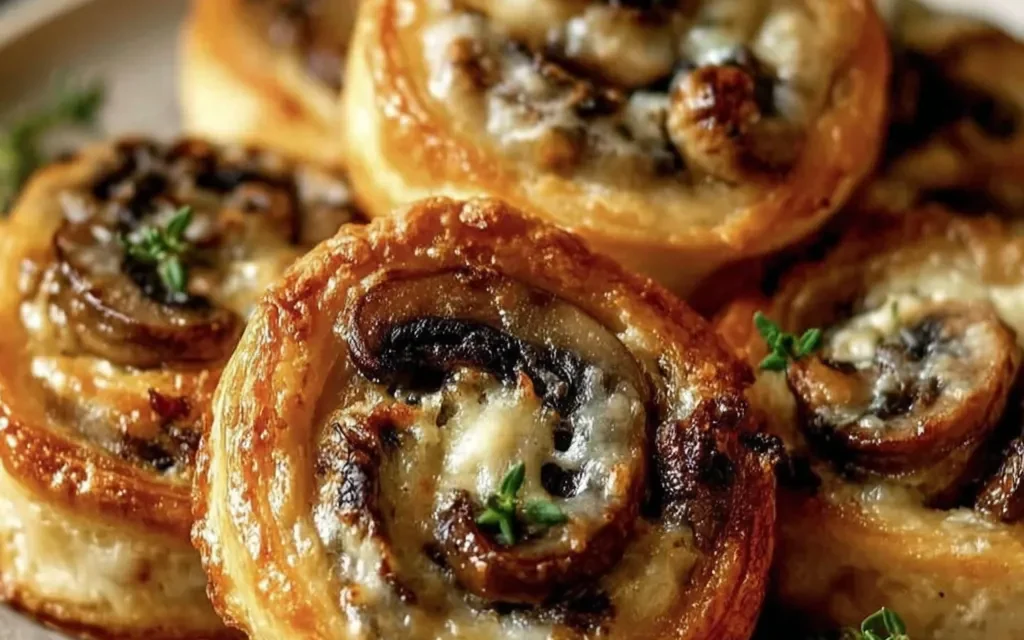
These Mushroom and Cheese Pinwheels are a delightful, easy-to-make appetizer that’s perfect for parties, game days, or any gathering. Buttery puff pastry is wrapped around a savory mushroom and cheese filling for a mouthwatering bite-sized treat.
Ingredients
– 1 sheet puff pastry, thawed
– 8 ounces sliced mushrooms
– 1 cup shredded cheddar cheese
– 2 tablespoons unsalted butter
– 1 clove garlic, minced
– 1 teaspoon dried thyme
– 1/4 teaspoon salt
– 1/4 teaspoon black pepper
Instructions
1. Preheat oven to 400°F (200°C). Line a baking sheet with parchment paper.
2. In a skillet, melt the butter over medium heat. Add the mushrooms, garlic, thyme, salt, and pepper. Cook for 5-7 minutes, stirring occasionally, until the mushrooms are tender and the liquid has evaporated.
3. Unfold the puff pastry sheet and roll it out to a 12×12-inch square. Spread the cooked mushroom mixture evenly over the pastry, leaving a 1/2-inch border.
4. Sprinkle the shredded cheese over the mushrooms.
5. Starting from one side, tightly roll up the pastry into a log. Slice the log into 12 equal pieces.
6. Place the pinwheels cut-side up on the prepared baking sheet. Bake for 15-18 minutes, or until the pastry is golden brown and the cheese is melted.
7. Serve the Mushroom and Cheese Pinwheels warm, garnished with fresh thyme if desired.
Notes
These pinwheels can be made in advance and refrigerated or frozen before baking. Just add a few extra minutes to the baking time if baking from frozen.
- Prep Time: 10
- Cook Time: 18
- Category: Appetizers & Snacks
- Method: Baking
- Cuisine: American
Conclusion
These Mushroom and Cheese Pinwheels are a true delight, combining the comforting flavors of mushrooms and cheese with a flaky, buttery dough. Whether you’re serving them as an appetizer at a party or enjoying them as a snack at home, this recipe is sure to become a new favorite. So grab your ingredients, preheat your oven, and get ready to create a batch of these irresistible pinwheels. Don’t forget to share your creations and let me know how they turned out!


