
Growing up, the aroma of Maple Baked Pears always reminds me of family gatherings and cozy autumn afternoons. It was a dish my grandmother would make without fail every year as the leaves started to change, and the scent would fill our home, beckoning us to the kitchen.
What Makes This Maple Baked Pears Recipe Special
I can still picture myself as a child, watching Grandma carefully peel and slice the juicy pears, then drizzle them with the most luscious maple syrup. The way the pears would caramelize in the oven, creating a perfect balance of sweetness and warmth – it was truly a dessert fit for a king (or a hungry group of kids!).
After years of experimenting and perfecting the recipe, I’m excited to share the secrets that make this Maple Baked Pears stand out from the rest. Get ready to enjoy the flavors of fall in every bite!
The Science Behind Perfect Maple Baked Pears
Understanding what happens during cooking makes all the difference. Here’s what sets this recipe apart:
| Technique | Why It Works | Result |
|---|---|---|
| Slow roasting at a lower temperature | Allows the pears to caramelize gradually, bringing out their natural sweetness | Intensely flavorful, tender pears that melt in your mouth |
| Basting the pears with the maple syrup mixture | The repeated basting creates a glossy, caramelized exterior | A beautiful, shiny finish that’s irresistible |
| Letting the pears rest before serving | This allows the juices to redistribute, creating a perfectly moist and cohesive texture | A delightfully juicy, yet not overly wet, final dish |
Essential Ingredients Breakdown
Core Ingredients
Here’s everything you’ll need to create the perfect Maple Baked Pears:
Primary Ingredients:
- Pears – Choose a firm, ripe variety like Bosc or Anjou for the best texture and flavor.
- Maple syrup – Look for a high-quality, pure maple syrup to ensure maximum sweetness and depth of flavor.
- Butter – A small amount of butter adds richness and helps the pears caramelize.
Flavor Enhancers:
- Cinnamon – Warm, aromatic cinnamon complements the maple and pear flavors beautifully.
- Vanilla extract – A touch of vanilla balances the sweetness and adds a comforting aroma.
- Heavy cream (optional) – For an extra indulgent touch, you can serve the Maple Baked Pears with a drizzle of heavy cream.
Step-by-Step Maple Baked Pears Instructions
Equipment You’ll Need
Before we start cooking, gather these essential tools:
- Baking sheet or oven-safe dish
- Paring knife and cutting board
- Measuring cups and spoons
- Basting brush (optional)
Preparation Timeline
Total Time: 55 minutes
- Prep Time: 15 minutes
- Cook Time: 40 minutes
- Rest/Cool Time: 10 minutes
Detailed Cooking Steps
Step 1: Preparation Phase
Preheat your oven to 375°F (190°C). Wash and peel the pears, then cut them in half lengthwise and remove the cores. Arrange the pear halves, cut-side up, on a baking sheet or oven-safe dish.
Step 2: Initial Cooking
In a small saucepan, combine the maple syrup and melted butter. Baste the pear halves generously with this mixture, making sure to get it into all the nooks and crannies.
Step 3: Flavor Development
Place the baking sheet in the preheated oven and bake for 25-30 minutes, basting the pears with the maple syrup mixture every 10 minutes. The pears should become tender and caramelized around the edges.
Step 4: Final Cooking Stage
Once the pears are fork-tender and the edges are golden brown, remove the baking sheet from the oven. If desired, finish the pears under the broiler for 2-3 minutes to further caramelize the tops.
Step 5: Finishing Touches
Allow the Maple Baked Pears to rest for 10 minutes before serving. Drizzle any remaining maple syrup mixture over the top, and optionally, add a dollop of heavy cream.
Pro Chef Tips for Success
🔥 Temperature Control Tips:
- Make sure your oven is preheated to the right temperature for even cooking.
- Use a meat thermometer to check for doneness – the pears should be tender when pierced with a fork.
- Adjust the cooking time as needed, depending on the size and ripeness of your pears.
⚡ Technique Secrets:
- Baste the pears generously to ensure the maple syrup caramelizes evenly.
- Broil the pears for the last few minutes to create a beautiful, glossy finish.
- Avoid overcrowding the pears on the baking sheet to allow for even cooking.
✨ Flavor Boosting Hacks:
- Add a sprinkle of chopped walnuts or pecans for a delightful crunch.
- Serve the Maple Baked Pears warm, allowing the flavors to really shine.
- Garnish with a sprig of fresh rosemary or a dusting of ground cinnamon for a touch of elegance.
Serving Suggestions & Pairings
Perfect Combinations
This Maple Baked Pears pairs beautifully with:
| Main Pairing | Why It Works | Serving Style |
|---|---|---|
| Vanilla ice cream | The cool, creamy ice cream contrasts with the warm, caramelized pears | Scoop a generous portion of the Maple Baked Pears alongside a scoop of vanilla ice cream |
| Crisp autumn salad | The sweetness of the pears balances the bitterness of greens, and the textures complement each other | Arrange the Maple Baked Pears on a bed of mixed greens, such as arugula or baby spinach |
| Buttery pound cake | The dense, rich pound cake provides a perfect base for the juicy, flavorful pears | Slice the pound cake and top with the warm Maple Baked Pears |
Occasion Ideas
Perfect for:
- Thanksgiving or Christmas – The flavors of Maple Baked Pears embody the cozy spirit of the holiday season.
- Dinner parties – This elegant dessert is sure to impress your guests and leave them wanting more.
- Weeknight treats – As a simple yet delightful weeknight dessert, Maple Baked Pears can brighten up any evening.
Storage & Make-Ahead Guide
Short-Term Storage (1-3 days)
Refrigerator Storage:
- Store the Maple Baked Pears in an airtight container in the refrigerator.
- Keep at a temperature between 35-40°F (2-4°C).
- Separate the pears from any remaining sauce or cream if storing longer than 1 day.
Reheating Instructions:
- To reheat, place the pears in a baking dish and warm in a 350°F (175°C) oven for 5-10 minutes, or until heated through.
- Alternatively, you can reheat individual portions in the microwave for 30-60 seconds, taking care not to overcook.
- Pro tip: Add a small drizzle of maple syrup or a dollop of cream before reheating to help maintain moisture and flavor.
Recipe Variations & Adaptations
Flavor Variations
Classic Variations:
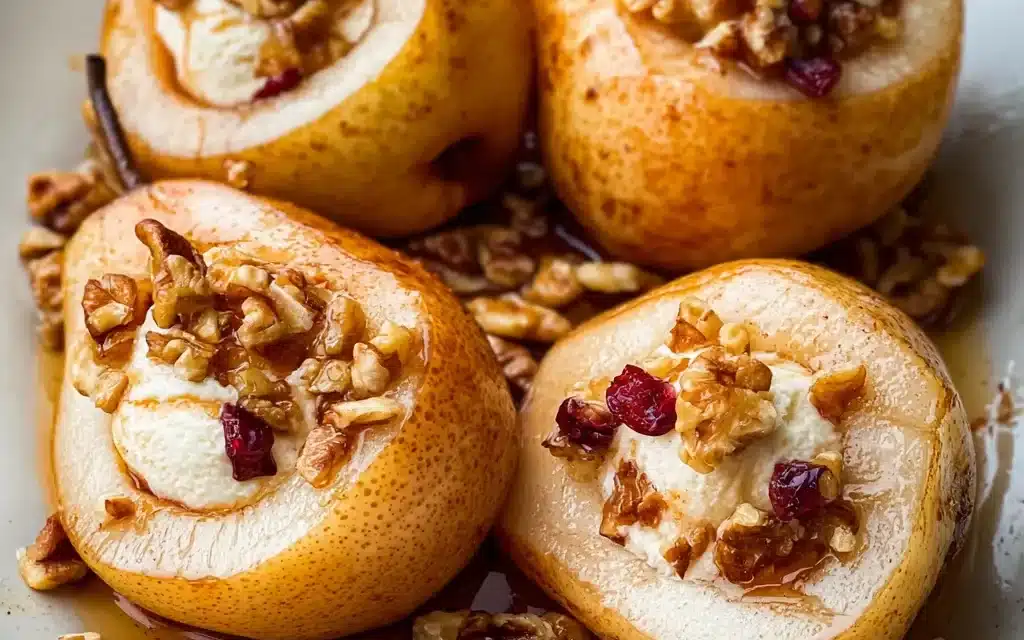
- Maple Walnut Baked Pears: Add chopped walnuts to the maple syrup mixture for a delightful crunch.
- Cinnamon Sugar Baked Pears: Sprinkle the pears with a mixture of cinnamon and brown sugar before baking.
- Maple Bourbon Baked Pears: Replace a portion of the maple syrup with a high-quality bourbon for a grown-up twist.
Dietary Adaptations
| Dietary Need | Substitutions | Notes |
|---|---|---|
| Gluten-Free | Use gluten-free baking sheet liners or parchment paper | The recipe is naturally gluten-free, but take care with any additional toppings or pairings. |
| Dairy-Free | Substitute the butter with a plant-based alternative, such as coconut oil or vegan butter | The texture and richness may be slightly different, but the dish will still be delicious. |
| Low-Carb | Use a low-carb sweetener, such as erythritol or monk fruit, in place of the maple syrup | Adjust the quantity as needed to achieve your desired level of sweetness. |
| Vegan | Replace the butter with coconut oil or vegan butter, and omit the optional heavy cream | The pears will still caramelize beautifully, and you can serve them with a dollop of cashew cream or coconut whipped cream. |
Troubleshooting Common Issues
Problem-Solution Guide
| Common Issue | Likely Cause | Quick Fix | Prevention |
|---|---|---|---|
| Pears are too firm or undercooked | Oven temperature was too high, or pears were not ripe enough | Increase the baking time in 5-minute increments until pears are tender | Choose ripe, but still firm, pears and ensure your oven is preheated to the correct temperature |
| Pears are too soft or mushy | Oven temperature was too low, or pears were overripe | Reduce the baking time and consider broiling the pears for a shorter duration to firm them up | Check pear ripeness and adjust cooking time accordingly; use a meat thermometer to monitor doneness |
| Maple syrup mixture is too thin or watery | Not enough butter was used, or the pears released too much liquid | Thicken the sauce by simmering it on the stovetop until it reaches the desired consistency | Use the recommended amount of butter and avoid overcrowding the pears on the baking sheet |
Frequently Asked Questions
Q: Can I make this Maple Baked Pears ahead of time?
A: Absolutely! The Maple Baked Pears can be prepared up to 3 days in advance. Store the cooked pears in an airtight container in the refrigerator, and reheat them in the oven or microwave before serving. If the pears have released a lot of liquid, you may want to drain it off before reheating to maintain the perfect texture.
Q: What’s the best substitute for maple syrup?
A: While nothing quite compares to the rich, caramel-like flavor of pure maple syrup, you can use honey or agave nectar as a substitute. Just keep in mind that the flavor profile will be slightly different. You may also need to adjust the sweetness level to your personal preference.
Q: How do I know when the Maple Baked Pears is perfectly done?
A: The pears should be tender when pierced with a fork, and the edges should be caramelized and golden brown. You can also use a meat thermometer to check that the internal temperature of the pears reaches 205-210°F (96-99°C), which is the optimal doneness.
Q: Can I double or halve this recipe?
A: Absolutely! This Maple Baked Pears recipe is very easy to scale up or down. When doubling the recipe, be sure to use a larger baking sheet or split the pears between two dishes to ensure even cooking. For halving, simply adjust the ingredient quantities accordingly and reduce the baking time by a few minutes.
Q: Why didn’t my Maple Baked Pears turn out like yours?
A: There are a few common issues that can affect the outcome of this recipe:
- Pears were not ripe enough or were overripe
- Oven temperature was too high or too low
- Pears were overcrowded on the baking sheet
- Maple syrup mixture was not basted on frequently enough
Refer to the Troubleshooting section for specific solutions to these problems. And don’t hesitate to reach out if you have any other questions!
Print
Maple Baked Pears
- Total Time: 35
- Yield: 8
Description
Discover the divine simplicity of Maple Baked Pears – a quick, beginner-friendly dessert that celebrates the flavors of fall. These caramelized pears are bursting with warm, cozy maple notes and make for a truly indulgent treat.
Ingredients
– 4 ripe pears, halved and cored
– 1/4 cup pure maple syrup
– 2 tbsp unsalted butter, melted
– 1/2 tsp ground cinnamon
– 1/4 tsp ground nutmeg
Instructions
1. – Preheat oven to 375°F (190°C).
2. – Arrange the pear halves in a baking dish, cut-side up.
3. – In a small bowl, whisk together the maple syrup, melted butter, cinnamon, and nutmeg.
4. – Drizzle the maple mixture over the pear halves, making sure to coat them evenly.
5. – Bake for 25-30 minutes, or until the pears are tender and the edges are caramelized.
6. – Serve warm, with a scoop of vanilla ice cream or a dollop of whipped cream, if desired.
Notes
For a richer flavor, try using a higher-quality maple syrup. You can also experiment with different spice blends, such as adding a pinch of ginger or allspice. Leftovers can be stored in the refrigerator for up to 3 days and reheated before serving.
- Prep Time: 10
- Cook Time: 25
- Category: Dessert
- Method: Baking
- Cuisine: American
Final Thoughts
There you have it – the ultimate guide to making perfect Maple Baked Pears! This recipe has been a game-changer in my kitchen, and I know it’ll become a staple in yours too.
What makes this recipe special:
- Foolproof techniques that work every time
- Flexible ingredients that adapt to your preferences
- Professional results with home kitchen equipment
Give this Maple Baked Pears recipe a try this week, and don’t forget to share your results! I’d love to see your creations – tag me on social media or leave a comment below with your variations and tips.
Your turn: What’s your favorite way to enjoy Maple Baked Pears? Share your family traditions or creative twists in the comments!


