
I’ll never forget the year I decided to make Hanukkah Candy Bark for the first time. It was right in the middle of the holiday season, and I was feeling a little overwhelmed with all the baking and cooking I had to do. But when I stumbled upon this Hanukkah Candy Bark recipe, I knew I had to give it a try.
I’ve always loved the festive flavors of Hanukkah, and the idea of creating a delicious and easy-to-make treat that captured those flavors just really appealed to me. So I gathered up all the ingredients, put on my favorite Hanukkah playlist, and got to work.
As I melted the chocolate and layered in the crushed candy canes and drizzle of white chocolate, I couldn’t help but feel a sense of excitement. This Hanukkah Candy Bark was going to be something special. And when I finally took that first bite, I knew I had really hit the mark. The combination of the rich, smooth chocolate, the refreshing peppermint, and the satisfying crunch of the candy canes was just absolute perfection.
From that moment on, Hanukkah Candy Bark became a staple in my holiday baking repertoire. It’s the perfect treat to whip up for parties, to give as gifts, or to simply enjoy on a cozy night in. And the best part? It’s so easy to make, it’s almost foolproof.
Why This Hanukkah Candy Bark Recipe Will Become Your Go-To
The Secret Behind Perfect Hanukkah Candy Bark
What makes this Hanukkah Candy Bark recipe so special is the perfect balance of flavors and textures. The rich, creamy chocolate provides a decadent base, while the crushed candy canes add a refreshing burst of peppermint and a satisfying crunch. And the drizzle of white chocolate on top takes it to the next level, adding a beautiful contrast and an extra touch of sweetness.
But the real secret is in the technique. By layering the ingredients in just the right way and allowing the Hanukkah Candy Bark to set properly, you end up with a treat that’s not only delicious, but also visually stunning. It’s the kind of dessert that’s sure to impress your friends and family, but it’s so easy to make that you’ll wonder why you didn’t start making it sooner.
Essential Ingredients You’ll Need
- High-quality dark chocolate: This is the foundation of the Hanukkah Candy Bark, so you’ll want to use a chocolate that’s rich, smooth, and flavorful.
- Crushed candy canes: The peppermint flavor and crunchy texture of the candy canes are what really make this Hanukkah Candy Bark special.
- White chocolate: The drizzle of white chocolate on top adds a beautiful contrast and an extra touch of sweetness.
- Vegetable oil: Just a small amount of oil helps the chocolate melt and spread evenly.
Step-by-Step Hanukkah Candy Bark Instructions
Preparing Your Hanukkah Candy Bark
Making Hanukkah Candy Bark is a breeze, and it only takes about 30 minutes from start to finish. You’ll need a baking sheet, a microwave or double boiler, and a few simple tools to get started.
1- Start by lining a baking sheet with parchment paper or a silicone baking mat. This will make it easy to remove the Hanukkah Candy Bark once it’s set.
2- In a microwave-safe bowl, melt the dark chocolate in 30-second intervals, stirring in between, until it’s smooth and glossy. Stir in a teaspoon of vegetable oil to help the chocolate spread more evenly.
3- Pour the melted chocolate onto the prepared baking sheet and use a spatula to spread it into an even layer.
4- Sprinkle the crushed candy canes over the top of the chocolate, pressing them in gently to help them adhere.
5- Melt the white chocolate in a separate bowl, and then use a fork to drizzle it over the top of the Hanukkah Candy Bark.
6- Allow the Hanukkah Candy Bark to cool completely at room temperature, then break it into pieces and enjoy!
Pro Tips for Success
- Be sure to use high-quality chocolate for the best flavor and texture.
- Crush the candy canes into small, uniform pieces for the perfect crunch.
- Melt the chocolate gently and slowly to prevent it from seizing up or burning.
- Chill the Hanukkah Candy Bark in the fridge for a few minutes if you want to speed up the cooling process.
- Avoid overhandling the Hanukkah Candy Bark once it’s set, as this can cause the chocolate to bloom and become discolored.
Serving and Storing Your Hanukkah Candy Bark
Perfect Pairings for Hanukkah Candy Bark
Hanukkah Candy Bark is the perfect treat to enjoy on its own, but it also pairs beautifully with a variety of other Hanukkah foods and drinks. Try serving it alongside a warm cup of hot chocolate or a glass of mulled wine for a cozy and festive pairing. It also makes a great addition to a Hanukkah dessert spread, alongside other holiday favorites like sufganiyot (jelly donuts) or latkes (potato pancakes).
Storage and Make-Ahead Tips
Hanukkah Candy Bark is a great make-ahead treat, as it keeps well for up to two weeks when stored in an airtight container at room temperature. You can also freeze it for up to three months, just be sure to thaw it at room temperature before serving.
If you’re making it in advance, simply store the Hanukkah Candy Bark in a single layer in an airtight container. When you’re ready to serve, simply break it into pieces and enjoy. It’s the perfect easy-to-make and easy-to-serve dessert for all your Hanukkah celebrations.
Variations and Dietary Adaptations for Hanukkah Candy Bark
Creative Hanukkah Candy Bark Variations
While the classic Hanukkah Candy Bark is hard to beat, there are plenty of ways to put your own spin on it. Try adding chopped nuts, like almonds or pistachios, for an extra crunch. Or swap out the candy canes for crushed gingerbread cookies or crushed oreos for a different flavor profile.
You could also get creative with the chocolate, using a mix of dark, milk, and white chocolate for a beautiful marbled effect. And for a pop of color, try sprinkling on some edible gold or silver dust or adding a sprinkle of colored sprinkles.
Making Hanukkah Candy Bark Diet-Friendly
For those with dietary restrictions, Hanukkah Candy Bark can still be enjoyed. To make it gluten-free, simply use gluten-free candy canes or omit them altogether. For a vegan version, swap out the regular chocolate and use dairy-free chocolate instead. And for a low-carb option, use a sugar-free chocolate and sugar-free candy canes.
No matter how you choose to customize it, Hanukkah Candy Bark is sure to be a hit with everyone on your holiday guest list.
Frequently Asked Questions
Q: Can I use any type of chocolate for Hanukkah Candy Bark?
A: While you can technically use any type of chocolate, we recommend using high-quality dark chocolate for the best flavor and texture. Milk chocolate or semi-sweet chocolate will also work, but the dark chocolate provides a richer, more indulgent experience.
Q: How do I know when the Hanukkah Candy Bark is done?
A: The Hanukkah Candy Bark is done when the chocolate has melted and spread into an even layer on the baking sheet. You’ll know it’s ready when the chocolate is smooth and glossy, and the crushed candy canes are firmly adhered to the surface.
Q: Can I make Hanukkah Candy Bark ahead of time?
A: Absolutely! Hanukkah Candy Bark is a great make-ahead dessert. Once it’s cooled and set, you can store it in an airtight container at room temperature for up to two weeks. You can also freeze it for up to three months.
Q: How much Hanukkah Candy Bark does this recipe make?
A: This recipe will yield approximately 12-16 servings of Hanukkah Candy Bark, depending on how you break it up. The exact serving size will depend on how thinly you spread the chocolate on the baking sheet.
Q: What should I do if the Hanukkah Candy Bark doesn’t set properly?
A: If the Hanukkah Candy Bark doesn’t set up as firmly as you’d like, it’s likely because the chocolate wasn’t melted properly or cooled completely. To troubleshoot, make sure you’re using high-quality chocolate and melting it gently, without overheating. You can also try popping the baking sheet in the fridge for a few minutes to help the chocolate set up faster.

Hanukkah Candy Bark
- Total Time: 40
- Yield: 12
Description
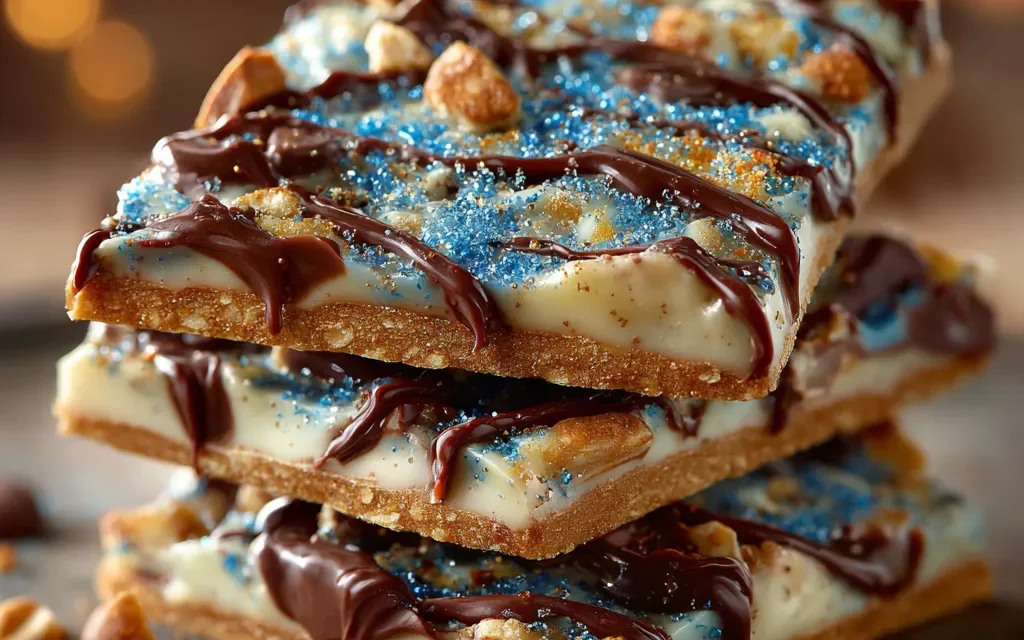
Hanukkah Candy Bark is a quick, easy, and delightful holiday dessert that’s perfect for parties, gifts, or cozy nights in. This no-fail recipe features a layer of rich, chocolatey goodness topped with crushed candy canes, sprinkles, and other festive treats.
Ingredients
– 12 oz milk chocolate, chopped
– 1 cup crushed candy canes
– 1/2 cup blue and white sprinkles
– 1/4 cup chopped walnuts (optional)
Instructions
1. 1. Line a baking sheet with parchment paper.
2. 2. Melt the chopped milk chocolate in a double boiler or microwave, stirring frequently until smooth.
3. 3. Pour the melted chocolate onto the prepared baking sheet and spread it into an even layer.
4. 4. Sprinkle the crushed candy canes, blue and white sprinkles, and chopped walnuts (if using) over the top of the chocolate.
5. 5. Refrigerate the bark for 30 minutes to 1 hour, or until completely set.
6. 6. Break the bark into pieces and enjoy!
Notes
– For a festive twist, use a combination of white chocolate and milk chocolate.
– Substitute crushed peppermint candies or crushed Oreo cookies for the candy canes.
– Add a drizzle of white chocolate or caramel over the top for extra decoration.
- Prep Time: 10
- Category: Dessert
- Method: No-Bake
- Cuisine: American
Conclusion
Hanukkah Candy Bark is a delicious and easy-to-make treat that’s perfect for the holiday season. With its rich chocolate, refreshing peppermint, and satisfying crunch, it’s a surefire hit with everyone who tries it.
Whether you’re making it for a Hanukkah party, to give as a gift, or just to enjoy on a cozy night in, this Hanukkah Candy Bark recipe is sure to become a new holiday staple in your home. So gather your ingredients, put on your favorite Hanukkah tunes, and get ready to create a dessert that’s sure to wow your friends and family. Enjoy!


