
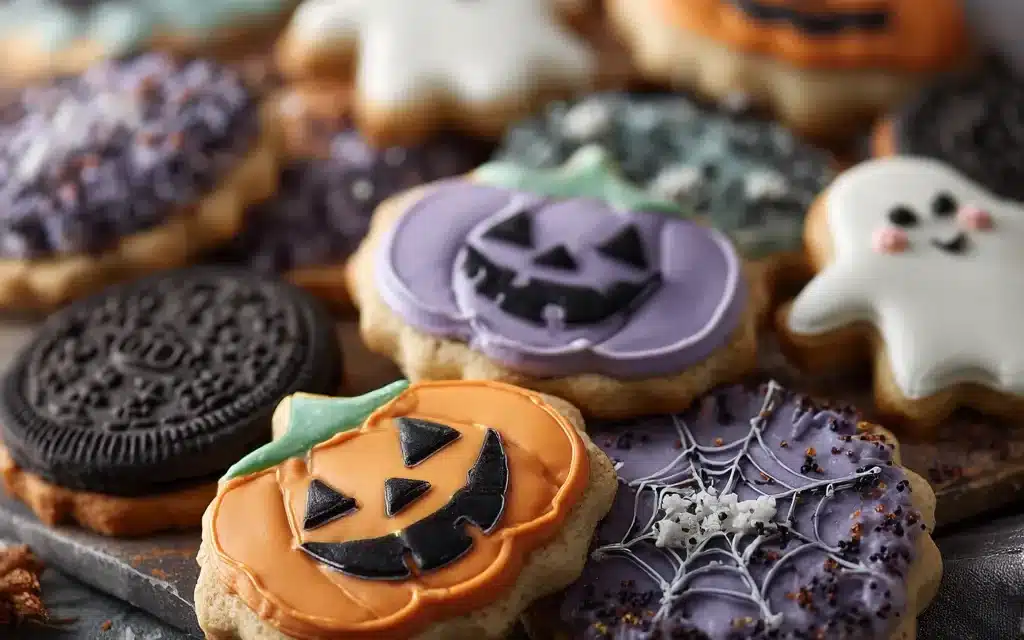
I’ll never forget the year my grandma taught me how to make her famous Halloween Sugar Cookies. I was just a little kid, but I can still smell the warm, buttery aroma wafting through her kitchen as we rolled out the dough and cut out the spooky shapes. It was our special tradition – one that brought our whole family together every October.
Even now, whenever I bake a batch of Halloween Sugar Cookies, I’m transported back to those cozy afternoons, covered in flour and giggling as we decorated the cookies with colorful icing and festive sprinkles. There’s just something magical about this recipe that makes it more than just a simple sugar cookie. It’s a connection to my roots, a way to honor my heritage, and a cherished memory I’ll hold onto forever.
What Makes This Halloween Sugar Cookies Recipe Special
Let me tell you why this Halloween Sugar Cookies recipe stands out from the crowd. After testing countless variations, I’ve discovered the perfect combination that delivers:
- Incredible flavor that’ll have your family asking for seconds
- Simple techniques that work every single time
- Flexible ingredients you can easily find at any grocery store
- Professional results without professional equipment
The Science Behind Perfect Halloween Sugar Cookies
Understanding what happens during cooking makes all the difference. Here’s what sets this recipe apart:
| Technique | Why It Works | Result |
|---|---|---|
| Creaming the butter and sugar until light and fluffy | Incorporating air into the dough creates a soft, tender texture | Cookies that melt-in-your-mouth with every bite |
| Rolling the dough to an even 1/4-inch thickness | Consistent thickness ensures even baking and prevents over-browning | Perfectly shaped cookies with uniform appearance |
| Chilling the dough before baking | Letting the gluten relax and the fat firm up creates better structure and shape | Cookies that hold their spooky designs without spreading |
Essential Ingredients Breakdown
Core Ingredients
Here’s everything you’ll need to create the perfect Halloween Sugar Cookies:
Primary Ingredients:
- Unsalted butter – the foundation for a rich, buttery flavor
- Granulated sugar – provides sweetness and helps with browning
- All-purpose flour – gives the cookies structure and stability
Flavor Enhancers:
- Ground cinnamon – adds warmth and a subtle spice note
- Vanilla extract – enhances the overall flavor profile
- Milk – helps bind the dough and creates a softer texture
Step-by-Step Halloween Sugar Cookies Instructions
Equipment You’ll Need
Before we start cooking, gather these essential tools:
- Stand mixer or hand mixer – for creaming the butter and sugar
- Rolling pin – for evenly rolling out the dough
- Cookie cutters in fun Halloween shapes – to create spooky designs
- Parchment paper – for lining baking sheets and easy cleanup
- Offset spatula – for transferring the delicate cookies
Preparation Timeline
Total Time: 1 hour 45 minutes
- Prep Time: 30 minutes
- Cook Time: 12-15 minutes
- Rest/Cool Time: 1 hour
Detailed Cooking Steps
Step 1: Preparation Phase
Begin by creaming the softened butter and sugar together in a stand mixer fitted with the paddle attachment. Beat on medium-high speed for 3-5 minutes until light, fluffy, and pale in color. Scrape down the sides of the bowl as needed. Next, add in the vanilla extract and mix until fully combined.
Step 2: Initial Cooking
In a separate bowl, whisk together the all-purpose flour, ground cinnamon, and a pinch of salt. With the mixer on low speed, gradually add the dry ingredients to the butter mixture, mixing just until a soft dough forms. Be careful not to overmix. Shape the dough into a disc, wrap in plastic wrap, and refrigerate for at least 1 hour (or up to 3 days).
Step 3: Flavor Development
Once chilled, preheat your oven to 350°F. Line baking sheets with parchment paper. Roll the dough out onto a lightly floured surface to 1/4-inch thickness. Use your favorite Halloween-themed cookie cutters to cut out shapes, carefully transferring them to the prepared baking sheets, spacing them about 2 inches apart.
Step 4: Final Cooking Stage
Bake the cookies for 12-15 minutes, rotating the pans halfway through, until the edges are just starting to turn golden brown. Keep a close eye to prevent over-browning. Allow the cookies to cool on the baking sheets for 5 minutes before transferring them to a wire rack to cool completely.
Step 5: Finishing Touches
Once the cookies are cooled, get creative with decorating! Use royal icing, sprinkles, and edible decorations to transform your Halloween Sugar Cookies into spooky masterpieces. Store the decorated cookies in an airtight container at room temperature for up to 1 week.
Pro Chef Tips for Success
🔥 Temperature Control Tips:
- Ensure your butter is softened to room temperature for optimal creaming
- Bake the cookies at 350°F for a crisp exterior and soft, chewy interior
- Check the cookies 2-3 minutes before the recommended baking time to prevent overbaking
⚡ Technique Secrets:
- Use a light touch when rolling out the dough to prevent tough cookies
- Chill the dough for at least an hour to help the cookies hold their shape
- Avoid overcrowding the baking sheets to ensure even baking
✨ Flavor Boosting Hacks:
- Add a teaspoon of ground nutmeg or allspice for a festive spice kick
- Swap out a tablespoon of the granulated sugar for brown sugar for deeper caramel notes
- Decorate with royal icing, sprinkles, and edible glitter for a professional bakery look
Serving Suggestions & Pairings
Perfect Combinations
This Halloween Sugar Cookies pairs beautifully with:
| Main Pairing | Why It Works | Serving Style |
|---|---|---|
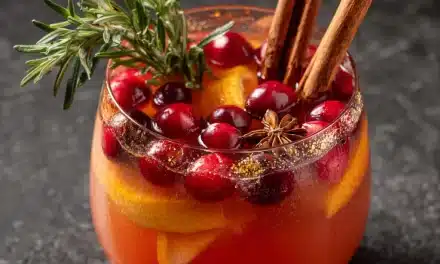
| Warm apple cider | The sweet, spiced cider complements the buttery, cinnamony cookies | Serve the cookies alongside mugs of apple cider for a cozy autumn pairing |
| Vanilla ice cream | The cool, creamy ice cream provides a delightful contrast to the crisp cookies | Scoop a dollop of ice cream on top of a warm cookie for an indulgent treat |
| Pumpkin spice latte | The rich, fragrant latte echoes the autumnal flavors in the cookies | Enjoy the cookies and latte together for the ultimate Halloween-inspired dessert |
Occasion Ideas
Perfect for:
- Halloween parties and trick-or-treating
- Autumn gatherings and Thanksgiving celebrations
- Christmas cookie exchanges and holiday baking
Storage & Make-Ahead Guide
Short-Term Storage (1-3 days)
Refrigerator Storage:
- Store the baked and cooled cookies in an airtight container in the refrigerator
- Keep at temperatures between 40-45°F
- Separate the decorated cookies from the undecorated ones to prevent smudging
Reheating Instructions:
- Method 1: Place the cookies on a baking sheet and warm in a 300°F oven for 5-7 minutes until slightly softened
- Method 2: Microwave individual cookies in 10-second intervals, being careful not to overheat
- Pro tip: Adding a small piece of bread to the container can help soften hardened cookies
Recipe Variations & Adaptations
Flavor Variations
Classic Variations:
- Spiced Pumpkin Cookies: Replace 1/4 cup of the granulated sugar with brown sugar and add 1 teaspoon of pumpkin pie spice
- Chocolate Chip Halloween Cookies: Fold in 1 cup of mini chocolate chips or chopped dark chocolate chunks
- Citrus-Infused Cookies: Grate the zest of 1 orange or lemon and add it to the dough for a bright, tangy twist
Dietary Adaptations
| Dietary Need | Substitutions | Notes |
|---|---|---|
| Gluten-Free | Use a 1-to-1 gluten-free flour blend in place of the all-purpose flour | The texture may be slightly more crumbly, but the flavor will still be delicious |
| Dairy-Free | Replace the butter with an equal amount of room temperature coconut oil or vegan butter | The cookies may spread a bit more during baking |
| Low-Carb | Substitute 1/2 the granulated sugar with an equal amount of erythritol or monk fruit sweetener | Expect a slightly denser texture and less spread |
| Vegan | Use coconut oil or vegan butter in place of the regular butter, and replace the egg with 1 tablespoon of ground flax or chia seeds mixed with 3 tablespoons of water | The cookies may have a slightly different texture but will still be delicious |
Troubleshooting Common Issues
Problem-Solution Guide
| Common Issue | Likely Cause | Quick Fix | Prevention |
|---|---|---|---|
| Cookies spreading too much | Dough was too warm when baked | Chill the dough for longer before cutting and baking | Always refrigerate the dough for at least 1 hour before baking |
| Dry, crumbly cookies | Overbaked or too much flour in the dough | Reduce the baking time by 2-3 minutes and be sure not to pack the flour when measuring | Use a light hand when measuring the flour and don’t over-mix the dough |
| Uneven browning | Oven temperature was inconsistent | Rotate the baking sheets halfway through baking | Ensure your oven is properly calibrated and preheat it fully before baking |
Frequently Asked Questions
Q: Can I make this Halloween Sugar Cookies ahead of time?
A: Absolutely! The dough can be made up to 3 days in advance and kept refrigerated. You can also bake the cookies ahead of time and store them in an airtight container at room temperature for up to 1 week. For best results, wait to decorate the cookies until right before serving.
Q: What’s the best substitute for ground cinnamon?
A: If you don’t have ground cinnamon on hand, you can substitute an equal amount of ground nutmeg, allspice, or pumpkin pie spice. These warm, autumnal spices will all complement the buttery, vanilla-forward flavor of the cookies.
Q: How do I know when the Halloween Sugar Cookies is perfectly done?
A: Keep an eye on the cookies towards the end of the baking time. They’re done when the edges are just starting to turn golden brown and the centers are still slightly soft. You can also gently press on a cookie – it should bounce back slightly rather than leaving an indent.
Q: Can I double or halve this recipe?
A: Yes, you can easily scale this recipe up or down as needed. If doubling, be sure to work in batches when rolling and cutting the dough to ensure even baking. When halving, adjust the baking time down by 2-3 minutes, as smaller cookies will bake faster.
Q: Why didn’t my Halloween Sugar Cookies turn out like yours?
A: There are a few common issues that can affect the outcome of these cookies:
- Overbaking can lead to dry, crumbly cookies
- Dough that’s too warm can cause excessive spreading
- Improperly measured ingredients, especially the flour, can throw off the texture
- Rotating the baking sheets halfway is crucial for even browning
Be sure to follow the recipe closely, pay attention to the visual and tactile cues, and make any necessary adjustments for your oven and climate. With a little practice, you’ll be baking professional-level Halloween Sugar Cookies in no time!
Print
The Perfect Halloween Sugar Cookies for Family Fun
- Total Time: 20
- Yield: 24
Description
These Halloween Sugar Cookies are a quick and easy way to celebrate the spooky season! With just 2 simple ingredients, you can whip up a batch of delicious, homemade cookies that are perfect for parties, gifts, or a fun family activity.
Ingredients
– 1 package refrigerated sugar cookie dough
– Halloween-themed sprinkles or decorations
Instructions
1. 1. Preheat oven to 350°F (175°C).
2. 2. Scoop tablespoon-sized balls of cookie dough and place them on a parchment-lined baking sheet, spacing them about 2 inches apart.
3. 3. Gently press the Halloween sprinkles or decorations into the top of each cookie dough ball.
4. 4. Bake for 8-10 minutes, until the cookies are lightly golden.
5. 5. Allow the cookies to cool on the baking sheet for 5 minutes before transferring them to a wire rack to cool completely.
Notes
For best results, use high-quality refrigerated sugar cookie dough. Feel free to get creative with different Halloween-themed sprinkles, candies, or decorations. These cookies can be stored in an airtight container for up to 1 week.
- Prep Time: 10
- Cook Time: 10
- Category: Dessert
- Method: Baking
- Cuisine: American
Final Thoughts
There you have it – the ultimate guide to making perfect Halloween Sugar Cookies! This recipe has been a game-changer in my kitchen, and I know it’ll become a staple in yours too.
What makes this recipe special:
- Foolproof techniques that work every time
- Flexible ingredients that adapt to your preferences
- Professional results with home kitchen equipment
Give this Halloween Sugar Cookies recipe a try this week, and don’t forget to share your results! I’d love to see your creations – tag me on social media or leave a comment below with your variations and tips.
Your turn: What’s your favorite way to enjoy Halloween Sugar Cookies? Share your family traditions or creative twists in the comments!


