
It was the night before Halloween, and I was in the kitchen elbow-deep in melted chocolate and sprinkles. I had decided to make a batch of Halloween Cake Pops for the big party the next day, and I was determined to make them perfect. You see, I had a bit of a reputation as the resident cake pop master in my friend group, and I wasn’t about to let them down.
As I carefully dipped each round cake ball into the glossy chocolate, I couldn’t help but reminisce about the first time I had tried my hand at making Halloween Cake Pops. It was a few years ago, and I had been so nervous that they wouldn’t turn out right. But with a bit of trial and error, and a whole lot of patience, I eventually mastered the art of creating these adorable, bite-sized treats. Now, I couldn’t imagine a Halloween celebration without them!
Why This Halloween Cake Pops Recipe Will Become Your Go-To
The Secret Behind Perfect Halloween Cake Pops
This Halloween Cake Pops recipe is truly special because it combines the classic flavors of a moist, rich chocolate cake with the whimsical and festive elements of Halloween. The key is in the attention to detail – from the perfectly smooth chocolate coating to the intricate, spooky decorations. Once you try these Halloween Cake Pops, you’ll understand why they’re the talk of the town (or at least your friend group!).
Essential Ingredients You’ll Need
- Chocolate Cake Mix: The foundation of these Halloween Cake Pops is a moist, flavorful chocolate cake. I prefer to use a high-quality mix to save time, but you can also make the cake from scratch if you’re feeling ambitious.
- Cream Cheese Frosting: This creamy, tangy frosting is the glue that holds the cake pops together, giving them a rich, indulgent flavor.
- Melting Chocolate: The coating is where you can really let your creativity shine. I like to use a combination of dark and white chocolate to achieve the perfect Halloween color palette.
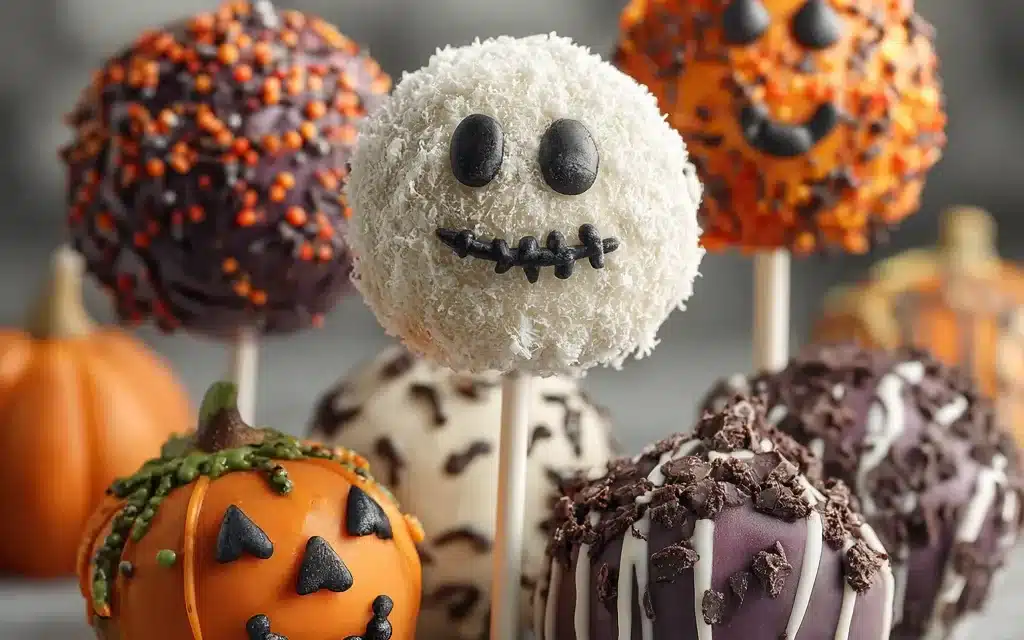
- Sprinkles and Decorations: From spooky eyeballs to festive orange and black sprinkles, the decorations are what truly make these Halloween Cake Pops stand out.
Step-by-Step Halloween Cake Pops Instructions
Preparing Your Halloween Cake Pops
Making Halloween Cake Pops is a fun and rewarding process that takes a bit of time and patience, but the end result is well worth it. In total, this recipe takes about 2-3 hours to complete, including baking the cake, assembling the pops, and decorating. You’ll need a few key pieces of equipment, like a cake pop maker or baking tray, lollipop sticks, and a sturdy workspace.
1- Start by baking the chocolate cake according to the package instructions. Allow it to cool completely before crumbling it into a large mixing bowl.
2- In a separate bowl, prepare the cream cheese frosting. Gently fold the frosting into the crumbled cake until a smooth, moldable dough forms.
3- Using a small cookie scoop or your hands, roll the cake mixture into 1-inch balls and place them on a parchment-lined baking sheet. Refrigerate for at least 30 minutes to firm up.
4- Melt the dark and white chocolate in separate bowls, either on the stovetop or in the microwave. The chocolate should be smooth and pourable, but not too hot.
5- One by one, dip the chilled cake balls into the melted chocolate, covering them completely. Gently tap off any excess and place the coated pops back on the baking sheet.
6- Immediately add your desired sprinkles, drizzles, and other Halloween-themed decorations while the chocolate is still wet. Allow the Halloween Cake Pops to set completely before serving.
Pro Tips for Success
The key to perfect Halloween Cake Pops is all in the details. Be sure to chill the cake balls thoroughly before dipping, and work in small batches to keep the chocolate at the right temperature. Also, don’t be afraid to get creative with your decorations – the spookier, the better!
Serving and Storing Your Halloween Cake Pops
Perfect Pairings for Halloween Cake Pops
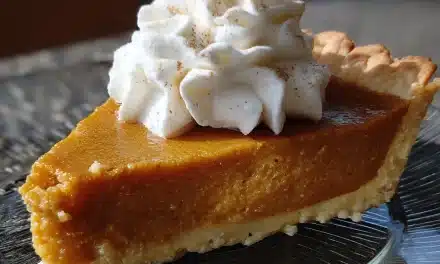
These Halloween Cake Pops make a delightful addition to any festive gathering, whether it’s a children’s Halloween party or a grown-up costume bash. They pair beautifully with a steaming mug of spiced apple cider or a shot of pumpkin-flavored liqueur for the adults. You can also serve them alongside other Halloween-themed treats, like mini-cupcakes or spooky brownies.
Storage and Make-Ahead Tips
Fortunately, Halloween Cake Pops are easy to make ahead of time and store for later. Once the chocolate coating has set, you can arrange the pops in a single layer in an airtight container and refrigerate for up to 5 days. When you’re ready to serve, simply let them come to room temperature for 15-20 minutes. You can also freeze the undecorated cake balls for up to 3 months, then thaw, coat, and decorate as needed.
Variations and Dietary Adaptations for Halloween Cake Pops
Creative Halloween Cake Pops Variations
The great thing about Halloween Cake Pops is that they lend themselves so well to endless variations and creative interpretations. Try swapping out the chocolate cake for a festive pumpkin or spice cake. Or, instead of the classic round shape, mold the cake into fun Halloween-themed designs, like bats, ghosts, or jack-o’-lanterns.
Making Halloween Cake Pops Diet-Friendly
For those with dietary restrictions, fear not – you can still enjoy these spooky treats. To make them gluten-free, use a certified gluten-free cake mix and replace the cream cheese frosting with a dairy-free alternative. For a vegan version, make the cake and frosting using plant-based ingredients, and coat the pops in melted vegan chocolate. And for a low-carb twist, experiment with sugar-free cake mixes and sugar-free chocolate coatings.
Frequently Asked Questions
Q: Can I use a homemade chocolate cake for this recipe instead of a mix?
A: Absolutely! Using a homemade chocolate cake can give the Halloween Cake Pops an even richer, more decadent flavor. Just be sure to cool the cake completely before crumbling and mixing with the frosting.
Q: How long do I need to chill the cake balls before dipping them in chocolate?
A: I recommend chilling the cake balls for at least 30 minutes, or up to 2 hours, before dipping. This helps them hold their shape better when coated in the melted chocolate.
Q: Can I make the Halloween Cake Pops in advance?
A: Yes, these treats are perfect for making ahead of time. You can store the undecorated cake balls in the freezer for up to 3 months, then thaw, coat, and decorate them when you’re ready to serve.
Q: How many Halloween Cake Pops does this recipe make?
A: This recipe will yield approximately 24-30 Halloween Cake Pops, depending on the size of the cake balls. Feel free to scale the recipe up or down as needed to serve your crowd.
Q: What if my chocolate coating cracks or doesn’t set properly?
A: If you encounter any issues with the chocolate coating, try reheating it gently to thin it out, then dip the cake balls again. Make sure the cake balls are thoroughly chilled before dipping, and work in small batches to keep the chocolate at the right temperature.

Heavenly Halloween Cake Pops
- Total Time: 50
- Yield: 24
Description
These Halloween Cake Pops are a devilishly delicious and easy-to-make treat that are perfect for parties, trick-or-treating, or any spooky occasion. Moist cake balls are dipped in creamy chocolate and adorned with festive sprinkles, edible eyes, and other frightfully fun decorations for a truly irresistible dessert.
Ingredients
– 1 box chocolate cake mix
– 1 (8 oz) package cream cheese, softened
– 1 cup chocolate chips, melted
– Assorted Halloween sprinkles, edible eyes, and other decorations
Instructions
1. 1. Prepare the cake mix according to package instructions and bake in a 9×13 inch pan. Allow to cool completely.
2. 2. Crumble the baked cake into a large bowl. Add the softened cream cheese and mix until well combined.
3. 3. Roll the cake mixture into 1-inch balls and place on a parchment-lined baking sheet.
4. 4. Melt the chocolate chips in a double boiler or microwave, stirring until smooth.
5. 5. Dip the cake balls into the melted chocolate, coating them completely. Allow excess chocolate to drip off.
6. 6. Immediately decorate the coated cake pops with sprinkles, edible eyes, and other Halloween-themed decorations.
7. 7. Refrigerate the cake pops for at least 30 minutes to allow the chocolate to set.
Notes
– For a fun variation, try adding a small piece of candy or a mini marshmallow inside the cake ball before dipping in chocolate. – Store the finished cake pops in the refrigerator for up to 1 week.
- Prep Time: 30
- Cook Time: 20
- Category: Dessert
- Method: Baking
- Cuisine: American
Conclusion
Halloween Cake Pops are the perfect way to add a festive, spooky touch to any holiday celebration. With their rich chocolate flavor, creamy frosting center, and whimsical decorations, these bite-sized treats are sure to be a hit with both kids and adults alike. So, what are you waiting for? Grab your apron, put on your best Halloween costume, and get ready to create a batch of these delightful Halloween Cake Pops that will have everyone coming back for more!


