
You know, I’ll never forget the first time I tried Fruity Pebbles Cheesecake Tacos. It was at my cousin’s birthday party when I was just a kid, and let me tell you, it was love at first bite. I can still picture my 10-year-old self, eyes wide with wonder, as I took that first delightful crunch into the crisp taco shell and experienced the explosion of flavors – the tangy cheesecake, the sweet and crunchy Fruity Pebbles, and that irresistible touch of nostalgia.
From that moment on, Fruity Pebbles Cheesecake Tacos became a staple at all our family gatherings. Birthdays, holidays, you name it – these colorful, whimsical treats were always the star of the show. I can remember my cousins and I fighting over the last one, giggling and shoving each other playfully as we each tried to claim it as our own. Those were such carefree, joyful times, and Fruity Pebbles Cheesecake Tacos were always at the center of it all.
Even now, as an adult, the mere thought of those Fruity Pebbles Cheesecake Tacos transports me right back to those happy childhood memories. It’s a taste of pure nostalgia, a delicious reminder of the simple pleasures that made our family gatherings so special. And you know what? I just can’t get enough of them. That’s why I’m so excited to share this recipe with you – because I know it’s going to become your new go-to dessert, just like it is for me.
Why This Fruity Pebbles Cheesecake Tacos Recipe Will Become Your Go-To
The Secret Behind Perfect Fruity Pebbles Cheesecake Tacos
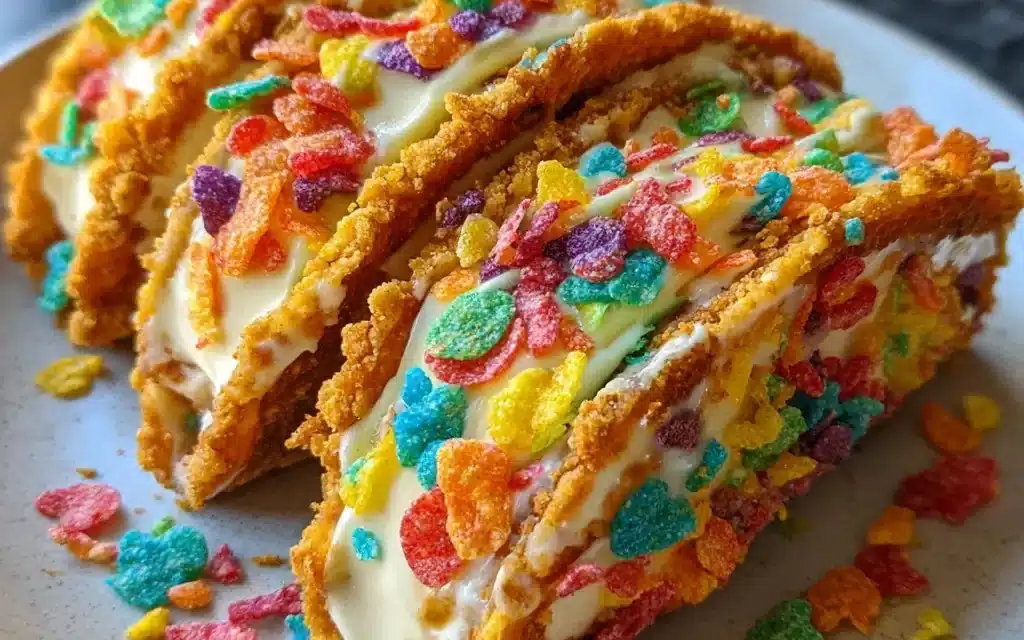
What makes this Fruity Pebbles Cheesecake Tacos recipe so special is the perfect balance of flavors and textures. The creamy, tangy cheesecake filling is the perfect complement to the crunchy, sweet Fruity Pebbles crust, creating a delightful contrast in every bite. And the taco shell? Well, that’s just the cherry on top, adding a delightful crunch and a fun, interactive element to the dessert.
But the real secret to this recipe lies in the attention to detail. From the precise ratio of ingredients to the careful technique in assembling the tacos, every step is designed to ensure that your Fruity Pebbles Cheesecake Tacos turn out absolutely perfect every single time. Trust me, once you try this recipe, you’ll never go back to any other version of Fruity Pebbles Cheesecake Tacos.
Essential Ingredients You’ll Need
To make these irresistible Fruity Pebbles Cheesecake Tacos, you’ll need a few key ingredients:
- Cream cheese: The foundation of the creamy, tangy cheesecake filling.
- Granulated sugar: To sweeten the cheesecake and balance the tang of the cream cheese.
- Eggs: For a rich, creamy texture in the filling.
- Fruity Pebbles cereal: The star of the show, providing the crunchy, colorful crust.
- Taco shells: The perfect vessel for your Fruity Pebbles Cheesecake delight.
- Whipped cream: A light, fluffy topping that complements the cheesecake beautifully.
Step-by-Step Fruity Pebbles Cheesecake Tacos Instructions
Preparing Your Fruity Pebbles Cheesecake Tacos
Get ready to wow your family and friends with these incredible Fruity Pebbles Cheesecake Tacos! This recipe is surprisingly easy to make, with just a few simple steps. In total, it’ll take you about an hour to whip up a batch of these delightful treats, and the end result is sure to be a showstopper.
1- Start by preheating your oven to 350°F. While that’s heating up, crush the Fruity Pebbles cereal into a fine crumb. You can do this by placing the cereal in a ziplock bag and using a rolling pin or the back of a spoon to crush it down.
2- In a large mixing bowl, beat the cream cheese with a hand mixer until it’s light and fluffy. Gradually add in the sugar, mixing well after each addition. Then, crack in the eggs one at a time, beating well after each egg.
3- Carefully fold the crushed Fruity Pebbles into the cheesecake filling until they’re evenly distributed. Be gentle here to avoid overmixing.
4- Scoop the Fruity Pebbles cheesecake filling into the taco shells, filling them to the top. You want to make sure you get that delicious filling in every nook and cranny.
5- Place the filled taco shells on a baking sheet and bake for 15-20 minutes, until the filling is set and the edges are lightly golden.
6- Remove the Fruity Pebbles Cheesecake Tacos from the oven and let them cool completely. Top each taco with a dollop of whipped cream and serve immediately for maximum enjoyment.
Pro Tips for Success
To ensure your Fruity Pebbles Cheesecake Tacos turn out perfectly every time, here are a few pro tips:
– Make sure your cream cheese is at room temperature before you start. This will help it blend smoothly into the filling.
– Don’t overmix the cheesecake batter once you’ve added the Fruity Pebbles. Gentle folding is the key to keeping that crunchy cereal texture.
– Keep an eye on the tacos while they’re baking – you want the filling to be set, but not overbaked and dry.
– Let the tacos cool completely before topping with whipped cream. This will help the filling set up nicely.
Serving and Storing Your Fruity Pebbles Cheesecake Tacos
Perfect Pairings for Fruity Pebbles Cheesecake Tacos
These Fruity Pebbles Cheesecake Tacos are the perfect treat for any occasion. They’re a fun and whimsical dessert that’s sure to bring a smile to everyone’s face. Serve them up at your next birthday party, family gathering, or even a casual weeknight dessert – they’re guaranteed to be a hit.
For the best pairing, I like to serve the Fruity Pebbles Cheesecake Tacos with a scoop of vanilla ice cream or a drizzle of caramel sauce. The cool, creamy ice cream or the rich caramel perfectly complements the tangy cheesecake and crunchy Fruity Pebbles. And don’t forget a tall glass of cold milk – it’s the classic accompaniment to these nostalgic treats.
Storage and Make-Ahead Tips
The great thing about Fruity Pebbles Cheesecake Tacos is that they can be made in advance, which makes them perfect for entertaining. Once the tacos have cooled completely, you can store them in an airtight container in the fridge for up to 3 days.
When you’re ready to serve, simply top the tacos with a dollop of whipped cream and you’re good to go. You can also make the cheesecake filling up to 2 days ahead of time and store it in the fridge until you’re ready to assemble the tacos.
And if you have any leftovers (which is doubtful, but just in case!), you can store them in the fridge for up to 5 days. Just be sure to keep them in an airtight container to preserve that delicious crunchiness of the taco shell.
Variations and Dietary Adaptations for Fruity Pebbles Cheesecake Tacos
Creative Fruity Pebbles Cheesecake Tacos Variations
The great thing about Fruity Pebbles Cheesecake Tacos is that they’re endlessly customizable. Try swapping out the Fruity Pebbles for other colorful cereal varieties, like Cocoa Pebbles or Cap’n Crunch, for a fun twist on the classic.
You could also experiment with different flavor profiles in the cheesecake filling. Maybe add a hint of citrus zest, or try infusing it with vanilla bean for an extra touch of luxury. And don’t be afraid to get creative with the toppings, too – a drizzle of chocolate sauce, a sprinkling of chopped nuts, or even a sprinkle of toasted coconut would all make delicious additions.
Making Fruity Pebbles Cheesecake Tacos Diet-Friendly
For those with dietary restrictions, you’ll be happy to know that Fruity Pebbles Cheesecake Tacos can easily be adapted to fit your needs. To make a gluten-free version, simply swap out the traditional taco shells for gluten-free ones. And for a dairy-free option, you can use a dairy-free cream cheese alternative and top the tacos with a coconut-based whipped cream.
If you’re watching your carb intake, you can make a low-carb version by using a keto-friendly cereal in place of the Fruity Pebbles. And for a vegan take on this dessert, use a tofu-based cream cheese filling and top with a dairy-free whipped topping.
No matter which dietary restriction you’re working with, I can guarantee that these Fruity Pebbles Cheesecake Tacos can be made to suit your needs. With a little creativity and a few simple swaps, you can enjoy all the deliciousness without any of the guilt.
Frequently Asked Questions
Q: Can I use a different type of cereal instead of Fruity Pebbles?
A: Absolutely! While Fruity Pebbles are the classic choice, you can experiment with other colorful, crunchy cereals like Cocoa Pebbles, Cap’n Crunch, or even Froot Loops. Just be sure to adjust the amount to match the size and texture of the cereal you’re using.
Q: How do I know when the cheesecake filling is fully baked?
A: The filling should be set and slightly puffed up when it’s done baking. You can also give the taco shells a gentle shake – the filling should be firm and not too jiggly. Keep an eye on them around the 15-minute mark and adjust the baking time as needed.
Q: Can I make the Fruity Pebbles Cheesecake Tacos ahead of time?
A: Absolutely! These tacos are perfect for making in advance. You can prepare the cheesecake filling up to 2 days ahead of time and store it in the fridge. When you’re ready to assemble, just scoop the filling into the taco shells and bake. You can also assemble the full tacos and store them in the fridge for up to 3 days before serving.
Q: How many Fruity Pebbles Cheesecake Tacos does this recipe make?
A: This recipe will yield approximately 12-15 Fruity Pebbles Cheesecake Tacos, depending on the size of your taco shells. You can easily scale the recipe up or down to serve a larger or smaller crowd.
Q: What if the taco shells get soggy?
A: If you find that the taco shells are getting a bit soft or soggy after baking, you can try a few things. First, make sure you’re letting the tacos cool completely before adding the whipped cream topping. You can also try baking the empty taco shells for a few minutes before filling them to help crisp them up. And be sure to store any leftovers in an airtight container in the fridge to help preserve the crunchiness.

Fruity Pebbles Cheesecake Tacos
- Total Time: 45
- Yield: 10
Description
Indulge in the perfect harmony of creamy cheesecake and crunchy Fruity Pebbles in these easy, delightful Fruity Pebbles Cheesecake Tacos.
Ingredients
– Fruity Pebbles cereal
– Cream cheese, softened
– Sweetened condensed milk
– Lemon juice
– Vanilla extract
– Taco shells or tortillas
Instructions
1. – In a large bowl, beat the cream cheese until smooth and creamy.
2. – Add in the sweetened condensed milk, lemon juice, and vanilla extract. Mix until well combined.
3. – Gently fold in the Fruity Pebbles cereal.
4. – Spoon the cheesecake mixture into taco shells or tortillas.
5. – Chill the Fruity Pebbles Cheesecake Tacos in the refrigerator for at least 30 minutes before serving.
6. – Enjoy your delicious and easy-to-make Fruity Pebbles Cheesecake Tacos!
Notes
These Fruity Pebbles Cheesecake Tacos can be made ahead of time and stored in the refrigerator for up to 3 days. For a fun twist, try using different flavors of Fruity Pebbles or add toppings like whipped cream, fresh berries, or a drizzle of chocolate sauce.
- Prep Time: 15
- Category: Dessert
- Method: No-Bake
- Cuisine: American
Conclusion
There you have it – the secret to making the most delicious, nostalgic Fruity Pebbles Cheesecake Tacos that will have your friends and family begging for more. This recipe is a true labor of love, infused with sweet childhood memories and designed to bring a smile to everyone who tries it.
So what are you waiting for? Grab those Fruity Pebbles, get baking, and get ready to create your own unforgettable memories with these incredible tacos. I can’t wait to hear how much you and your loved ones enjoy them. Drop me a comment and let me know what you think – I’d love to hear all about it!


